Creating your own Leather Chaps can be a rewarding project blending traditional craftsmanship with personal style. Whether you’re gearing up for a rodeo, embarking on a motorcycle ride or just adding a unique piece to your wardrobe this guide is your step by step companion to making leather chaps that are both durable and stylish. So grab your materials and let’s saddle up for a detailed journey into the world of leatherwork.
Introduction to Leather Chaps
Leather chaps historically worn by cowboys and ranch workers for protection have evolved into a fashion statement and protective gear for bikers and horseback riders alike. Making your own means you can customize them for a perfect fit and personal touch.
Materials You’ll Need
- Leather: Choose a durable yet flexible type of leather. Cowhide is a popular choice for its balance of toughness and pliability.
- Pattern: You can create your own or find one online. Adjustments might be necessary to tailor it to your size.
- Tools: Sharp scissors or a leather cutter, leather needle, strong thread, a hammer and possibly a sewing machine that can handle leather.
- Hardware: Depending on the style you may need buckles snaps or laces for closure.
Step 1: Designing Your Chaps
Start with a clear vision. Are you aiming for traditional cowboy chaps, sleek motorcycle chaps or something entirely unique? This decision will guide your pattern choice and material selection. Measure your waist hips and the length of your leg from waist to ankle to ensure a good fit.
Step 2: Choosing Your Leather
When selecting leather consider thickness and flexibility. Leather is sold by the hide and is priced by square footage. For chaps a medium to heavyweight leather is ideal. Visit a local leather supplier where you can feel the material. This tactile experience is crucial for choosing the right hide.
Step 3: Preparing the Pattern
Lay out your pattern on a large table or flat surface. If you’re creating your pattern use measurements taken earlier to draw the chaps adding a few inches for seam allowances and adjustments. Cut the pattern out of paper first to make any necessary corrections before moving on to the leather.
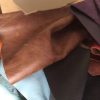
Step 4: Cutting the Leather
Place your pattern on the leather using weights to hold it in place. Carefully cut around the pattern with sharp scissors or a leather cutter. Precision is key; mistakes can be costly due to the price of leather.
Step 5: Sewing the Pieces Together
Thread your leather needle with a strong durable thread. If you’re hand sewing a saddle stitch is recommended for its strength. For those using a sewing machine ensure it’s capable of handling leather. Sew slowly removing pins as you go to avoid needle breakage.
Step 6: Adding the Hardware
Decide on the type of closure you want. Buckles offer adjustability while snaps or zippers provide a sleek look. Attach your chosen hardware according to the instructions using a hammer or special tools as needed. Ensure everything is secure and aligned.
Step 7: Customizing Your Chaps
Now’s the time to add any personal touches. Embossing tooling or adding decorative stitches can make your chaps truly one of a kind. Experiment with designs on scrap leather before committing to your final piece.
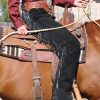
Step 8: Fitting and Final Adjustments
Try on your chaps with the shoes or boots you plan to wear them with. Walk around, sit down and move as you normally would to ensure comfort and mobility. Make any necessary adjustments to the fit or length.
Conclusion: Enjoying Your Custom Leather Chaps
Congratulations! You’ve crafted a unique and personal piece of wearable art. Leather chaps not only offer protection and functionality but also allow you to express your individual style. Whether you’re hitting the open road working on the ranch or attending a themed event your custom chaps will stand out.
Care and Maintenance
Leather requires care to maintain its look and durability. Clean your chaps with a damp cloth and use leather conditioner regularly. Store them in a cool dry place to prevent damage.
Further Exploration
Now that you’ve mastered chaps, why not explore other leather projects? Belts, vests and saddlebags are great next steps to enhance your leatherworking skills.
Final Thoughts
Making leather chaps is a fulfilling project that marries creativity with practical skills. Each pair tells a story reflecting the maker’s personality and craftsmanship. As you wear your chaps remember the journey from raw leather to a finished piece and consider the new stories they’ll help you tell.
By following these steps and allowing room for creativity you’ll not only craft a functional garment but also connect with a tradition of leatherwork that spans centuries. Whether for practical use or personal expression your handmade leather chaps will serve as a testament to your skill and vision


Recent Comments